Backend Initialization Guide
Initialize and bootstrap your backend infrastructure with automated code generation and repository integration
ℹ️Prerequisites
Before initializing the backend, make sure you have already set up your repository and have a cloud profile configured.
Navigate to Architecture Details
From the architectures landing page, click on your recently created architecture to access its details page.
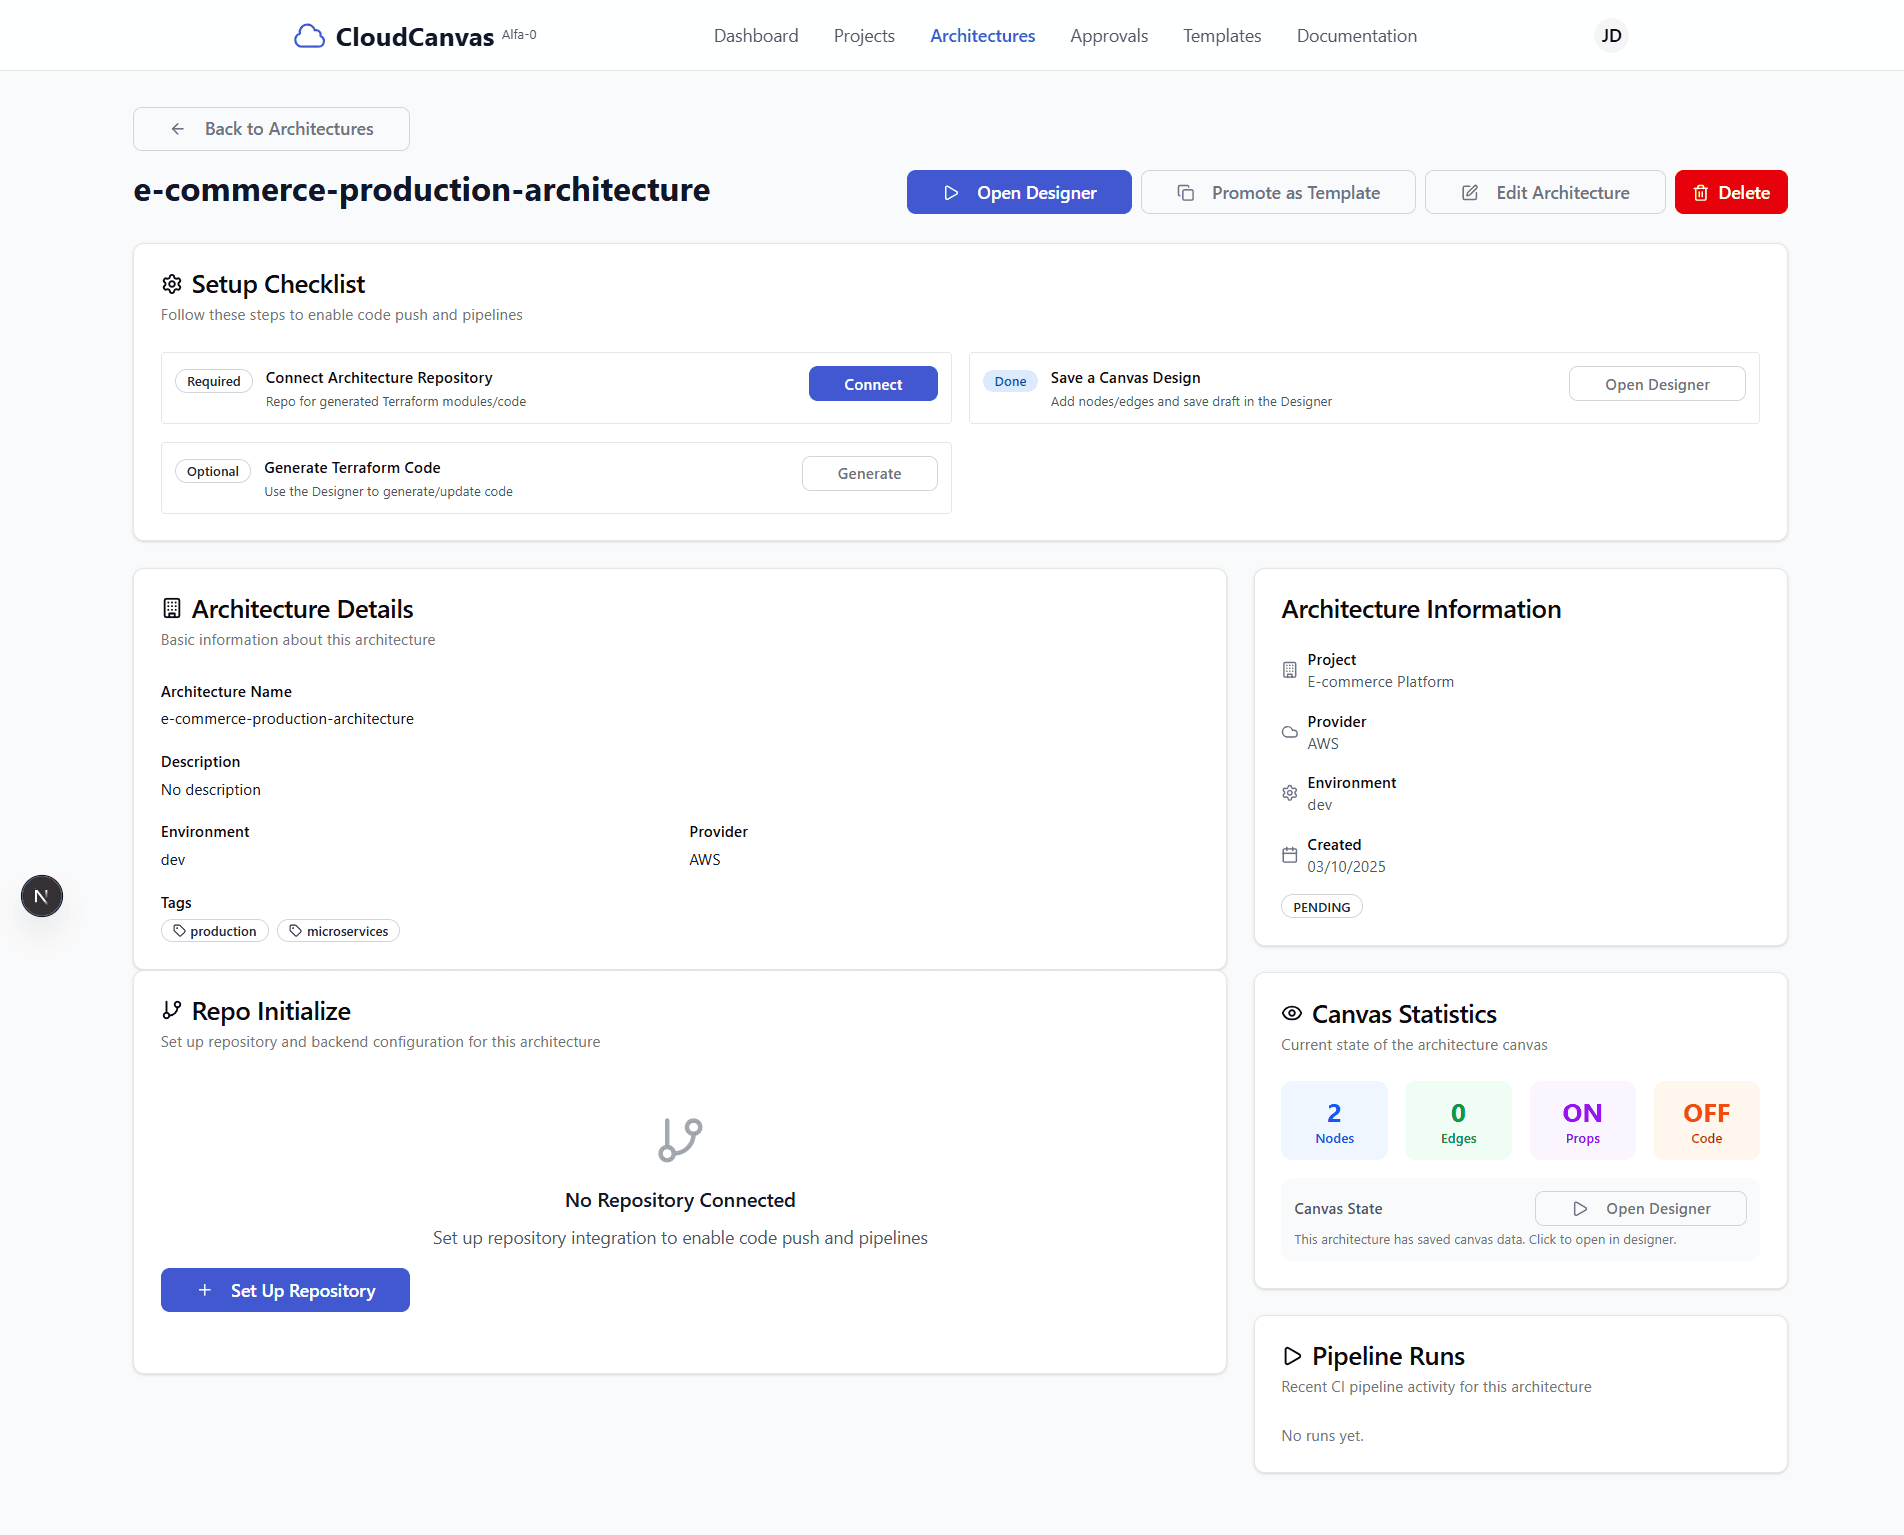
Architecture details page with backend initialization section
Access Bootstrap Backend
Scroll down on the architecture details page to find the "Bootstrap Backend" section and click the button to begin backend initialization.
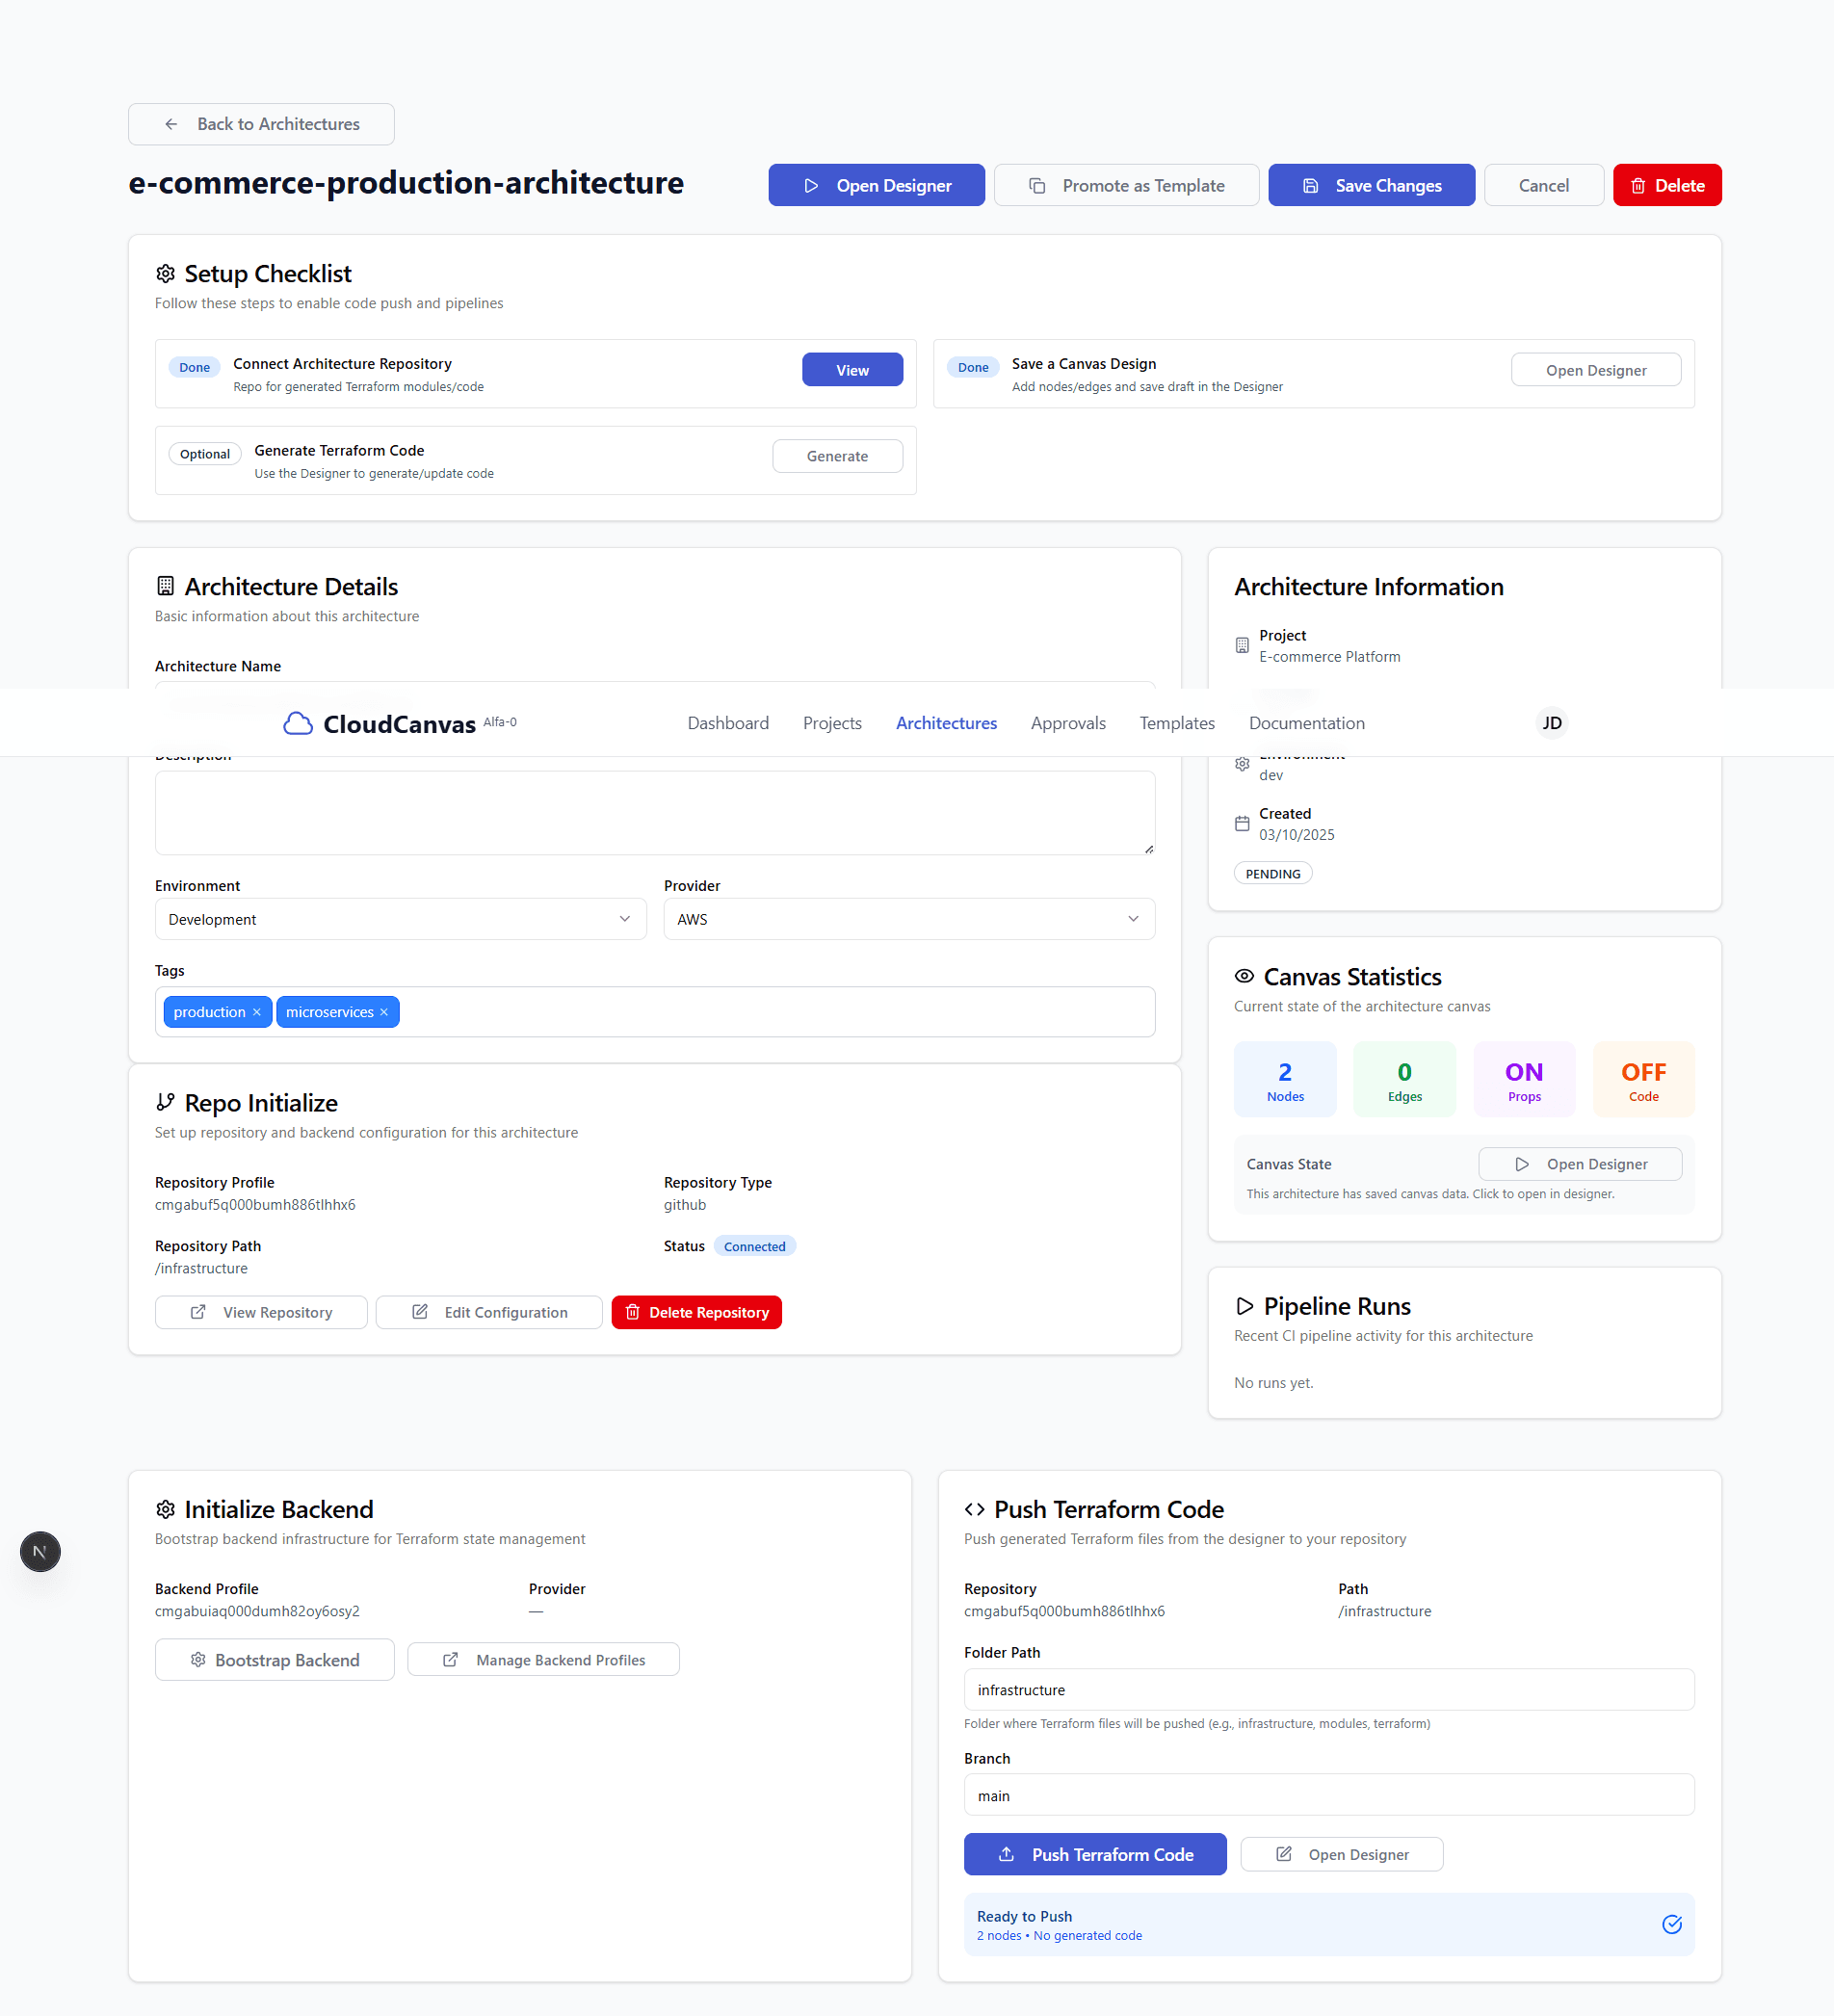
Backend initialization section with bootstrap backend button
💡 Tip: The backend bootstrap process will generate all necessary backend infrastructure code for your architecture.
Generate Bootstrap Code
Click "Generator Bootstrap" to start the automated backend code generation process. This will:
- Generate backend infrastructure code based on your architecture
- Create necessary configuration files
- Set up deployment scripts and CI/CD configurations
- Wait for the generation process to complete (this may take several minutes)
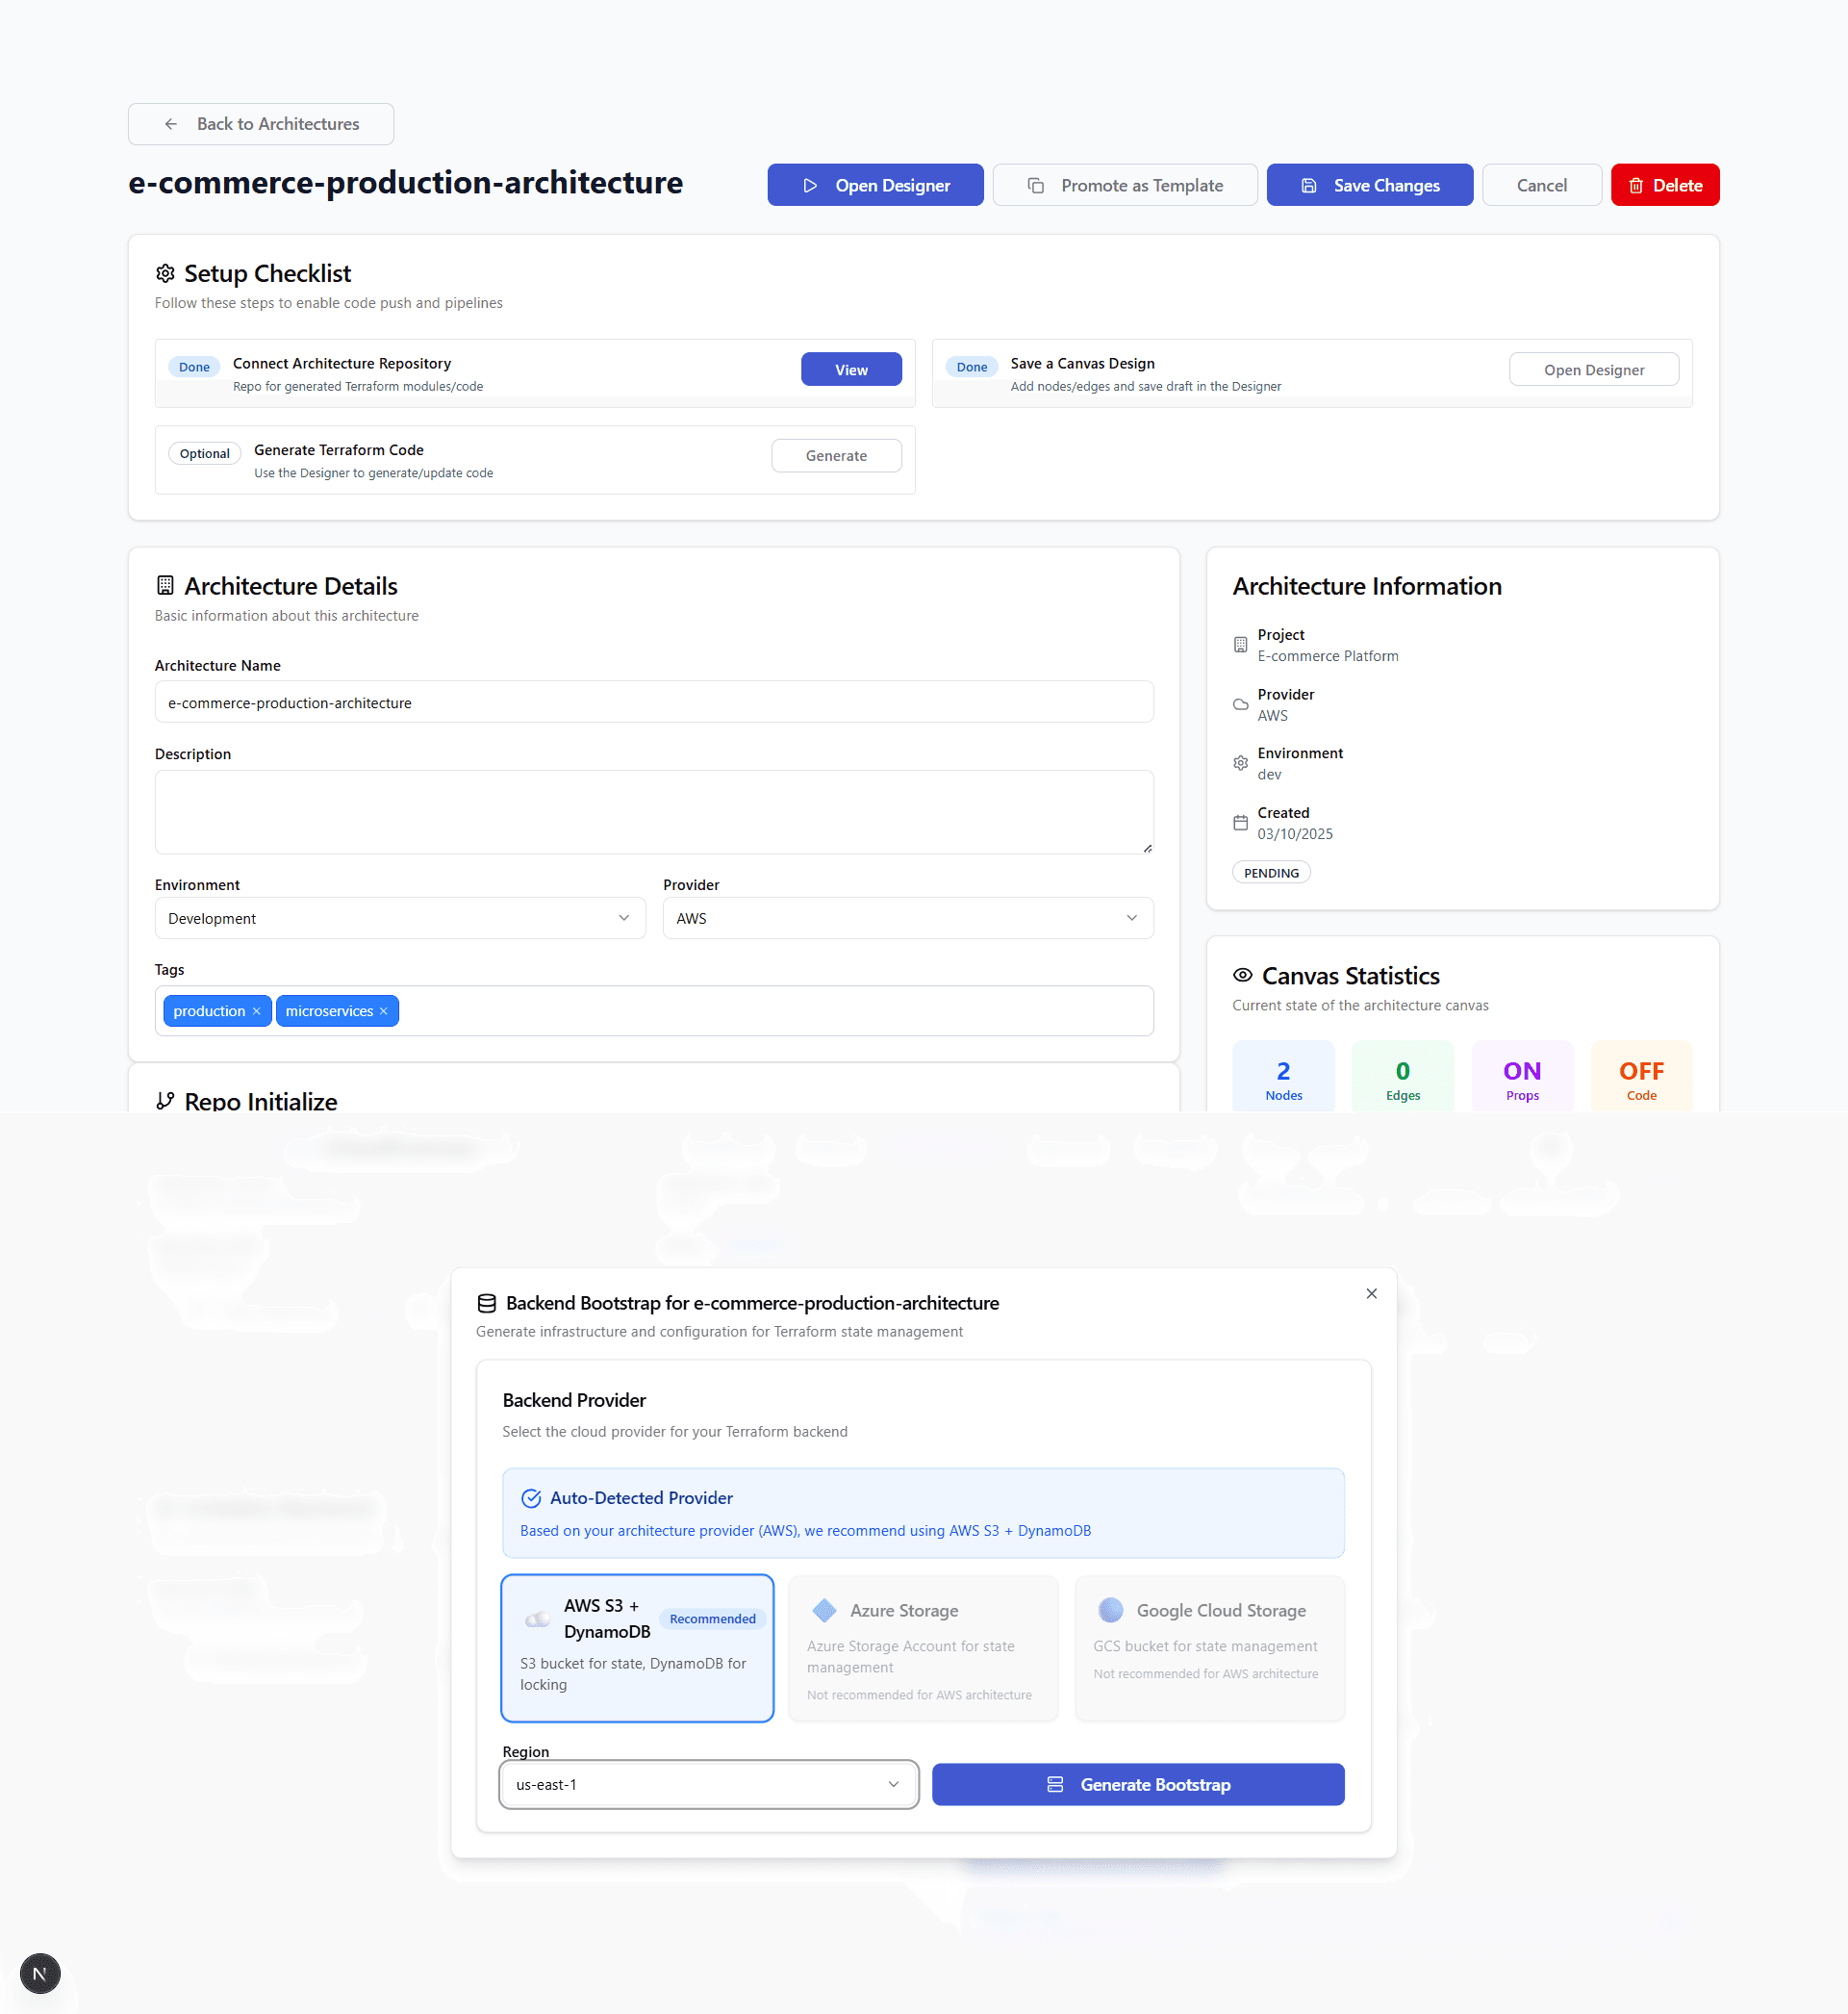
Backend bootstrap dialog with provider selection and configuration options
⏳ Note: The bootstrap generation process can take several minutes to complete. Please be patient and do not close the browser during this process.
Push to Repository
After the bootstrap generation is complete, scroll down to find the "Push to Repository" button and click it to push the generated backend code to your repository.
🚀 Success: This will automatically create a pull request in your GitHub repository with all the generated backend code and open it in a new tab for you to review.
Review Generated Code
On the GitHub page that opens automatically, you can review the generated backend code:
- Click the "<> Code" tab to view the repository contents
- Switch to the branch that contains
cloudcanvas/backend-in its name - Click on the "backend" folder to explore the generated files
- Review the generated backend infrastructure code
The backend folder will contain all the necessary files for your backend infrastructure, including deployment configurations, environment files, and CI/CD pipeline definitions.
Backend Initialization Features
Automated Code Generation
Generate complete backend infrastructure code based on your architecture design with minimal manual configuration.
Repository Integration
Automatically push generated code to your GitHub repository with proper branch management and pull request creation.
CI/CD Pipeline Setup
Configure automated deployment pipelines with your cloud provider for seamless backend deployment.
Environment Configuration
Set up environment-specific configurations and secrets management for secure backend deployment.
Generated Backend Files
Core Backend Files
- • Dockerfile: Container configuration for your backend services
- • docker-compose.yml: Multi-service orchestration configuration
- • package.json: Node.js dependencies and scripts
- • server.js: Main backend server implementation
Configuration Files
- • .env.example: Environment variables template
- • config/: Application configuration files
- • middleware/: Express middleware configurations
- • routes/: API route definitions
Deployment Files
- • deploy/: Deployment scripts and configurations
- • .github/workflows/: GitHub Actions CI/CD pipelines
- • kubernetes/: Kubernetes deployment manifests
- • terraform/: Infrastructure as Code configurations
🔧Troubleshooting
Bootstrap generation fails?
Ensure your cloud profile has the necessary permissions and that your architecture design is complete. Check the browser console for any error messages.
Repository push fails?
Verify that your GitHub repository exists and that you have the necessary permissions to push code. Check your repository settings and access tokens.
Generated code incomplete?
Make sure your architecture design includes all necessary components. Some backend features require specific architecture elements to be properly configured.
🚀 What's Next?
Your backend infrastructure is now initialized! You can proceed to push Terraform code or start deploying your backend services.