Repository Setup Guide
Configure cloud profiles and repository integration for automated deployment and CI/CD pipelines
ℹ️Prerequisites
Before setting up repositories, make sure you have already designed an architecture that you want to deploy.
Navigate to Architecture Details
From the architectures landing page, click on your recently created architecture to view its details page.
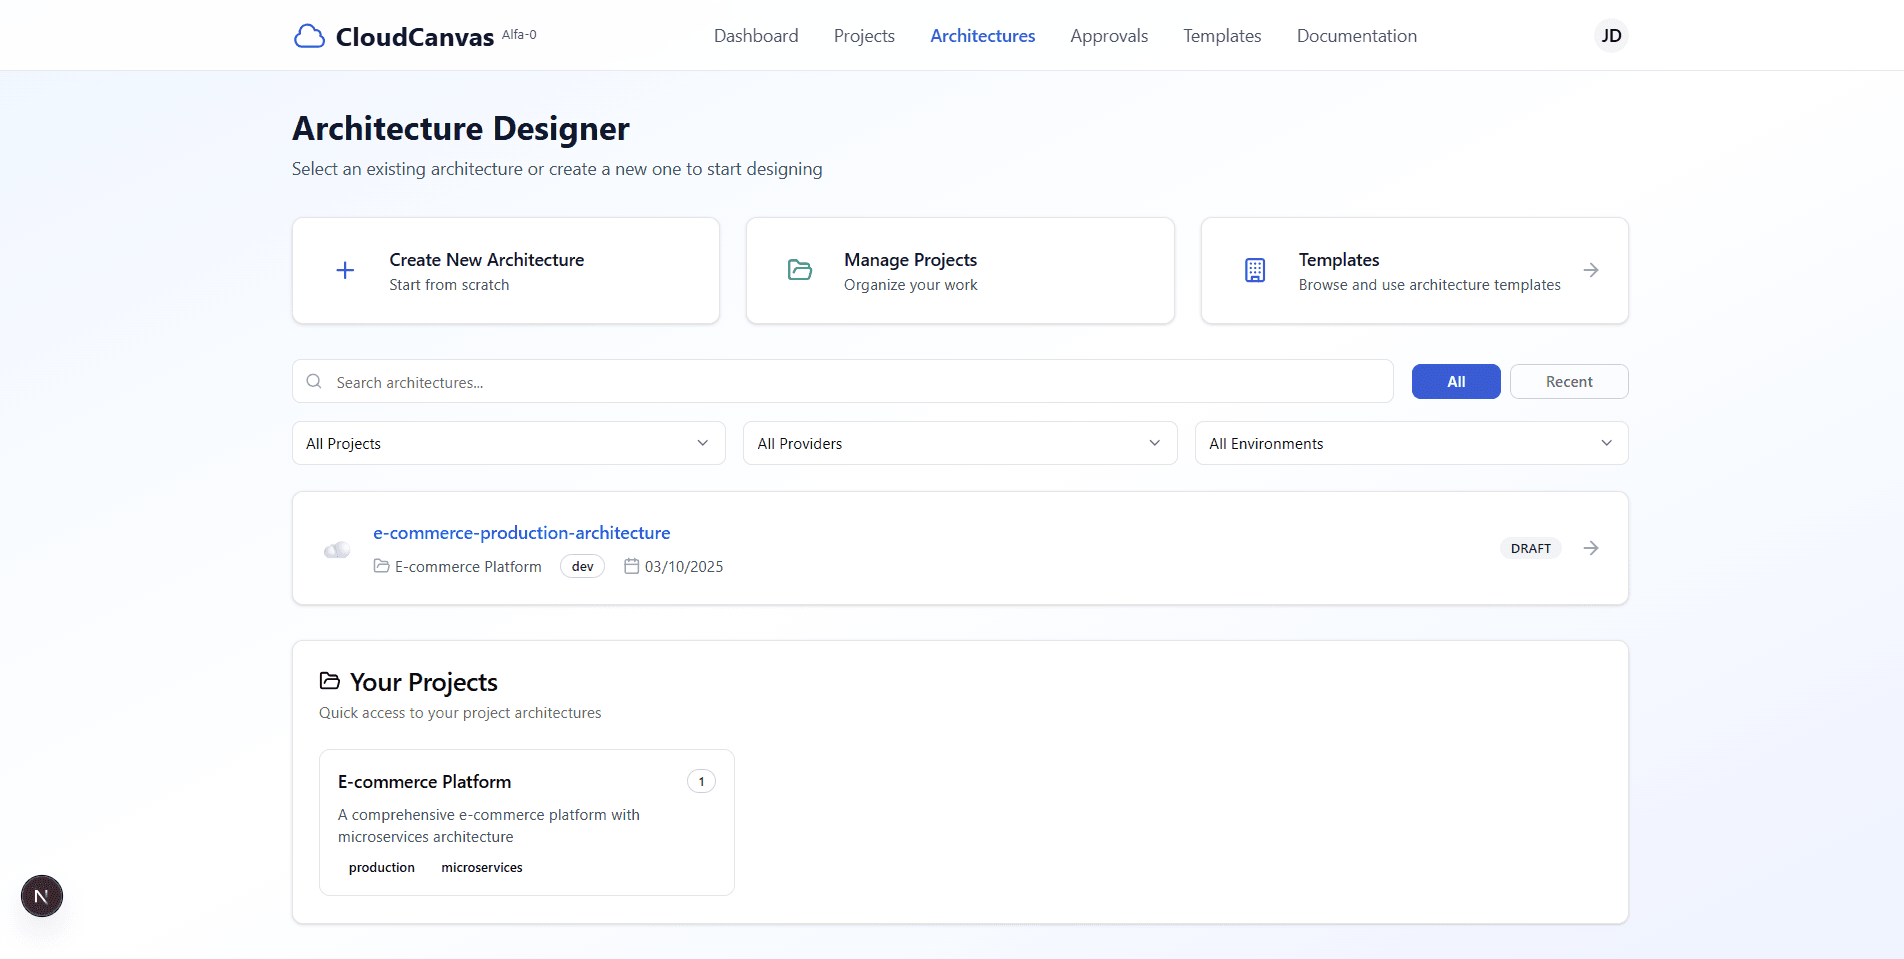
Architectures listing with your created architecture
Access Repository Setup
On the architecture details page, scroll down to find the "Setup Repository" section and click the button to begin configuration.
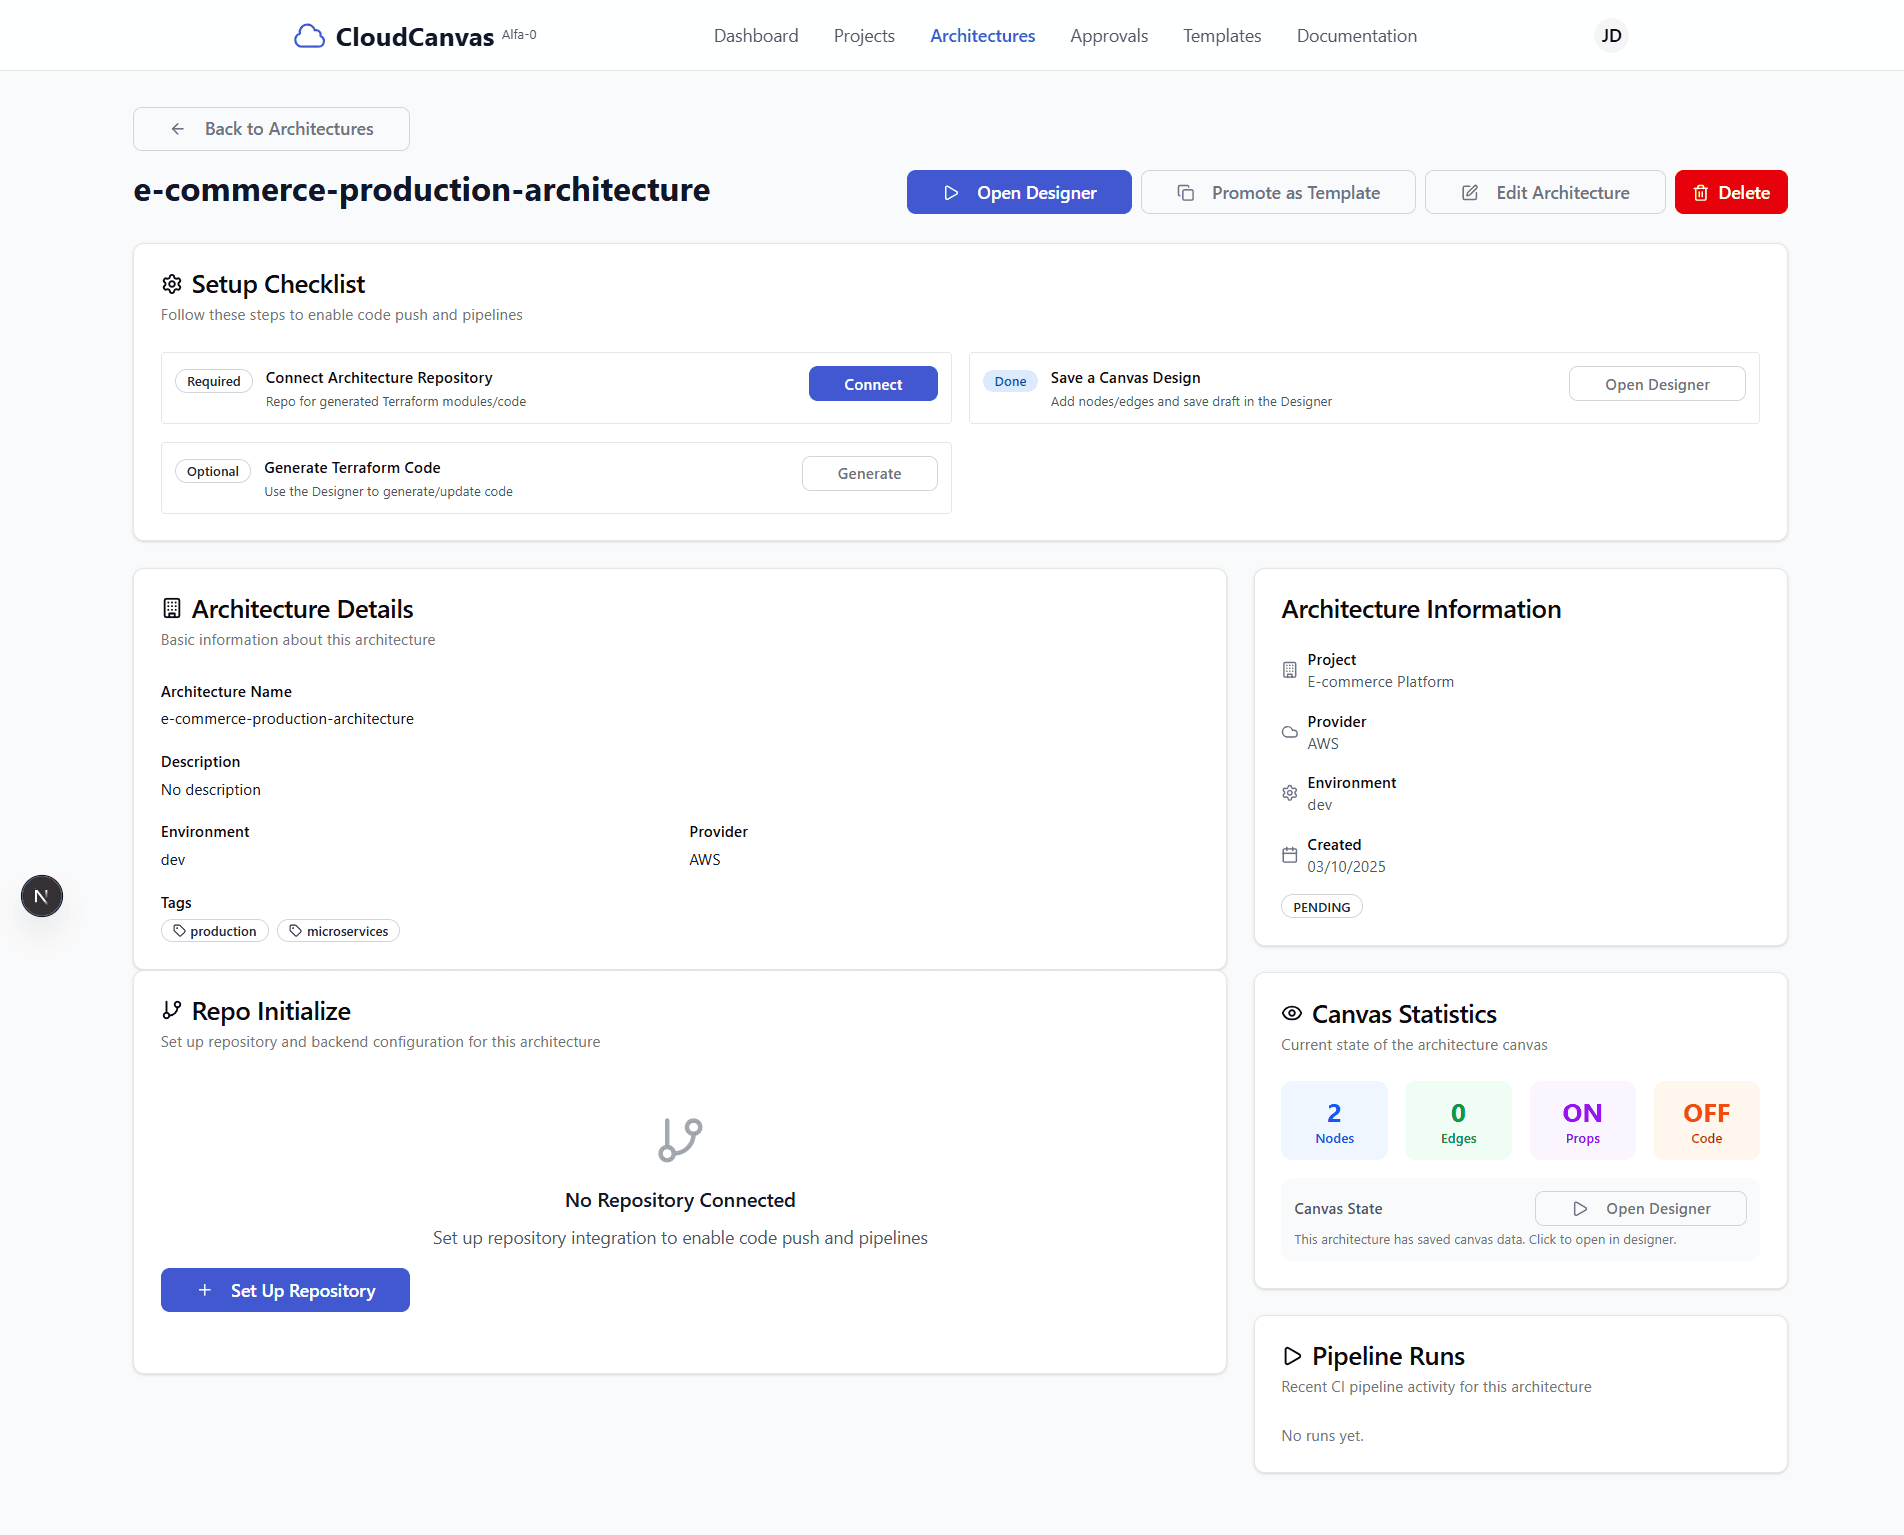
Architecture details page with repository setup section
Configure Cloud Profile
In the repository setup page, you'll need to select or create a cloud profile for your deployment:
- If you have existing cloud profiles, select one from the dropdown
- If no profiles exist, click "Create Cloud Profile" to set up a new one
- Configure your cloud provider credentials and settings
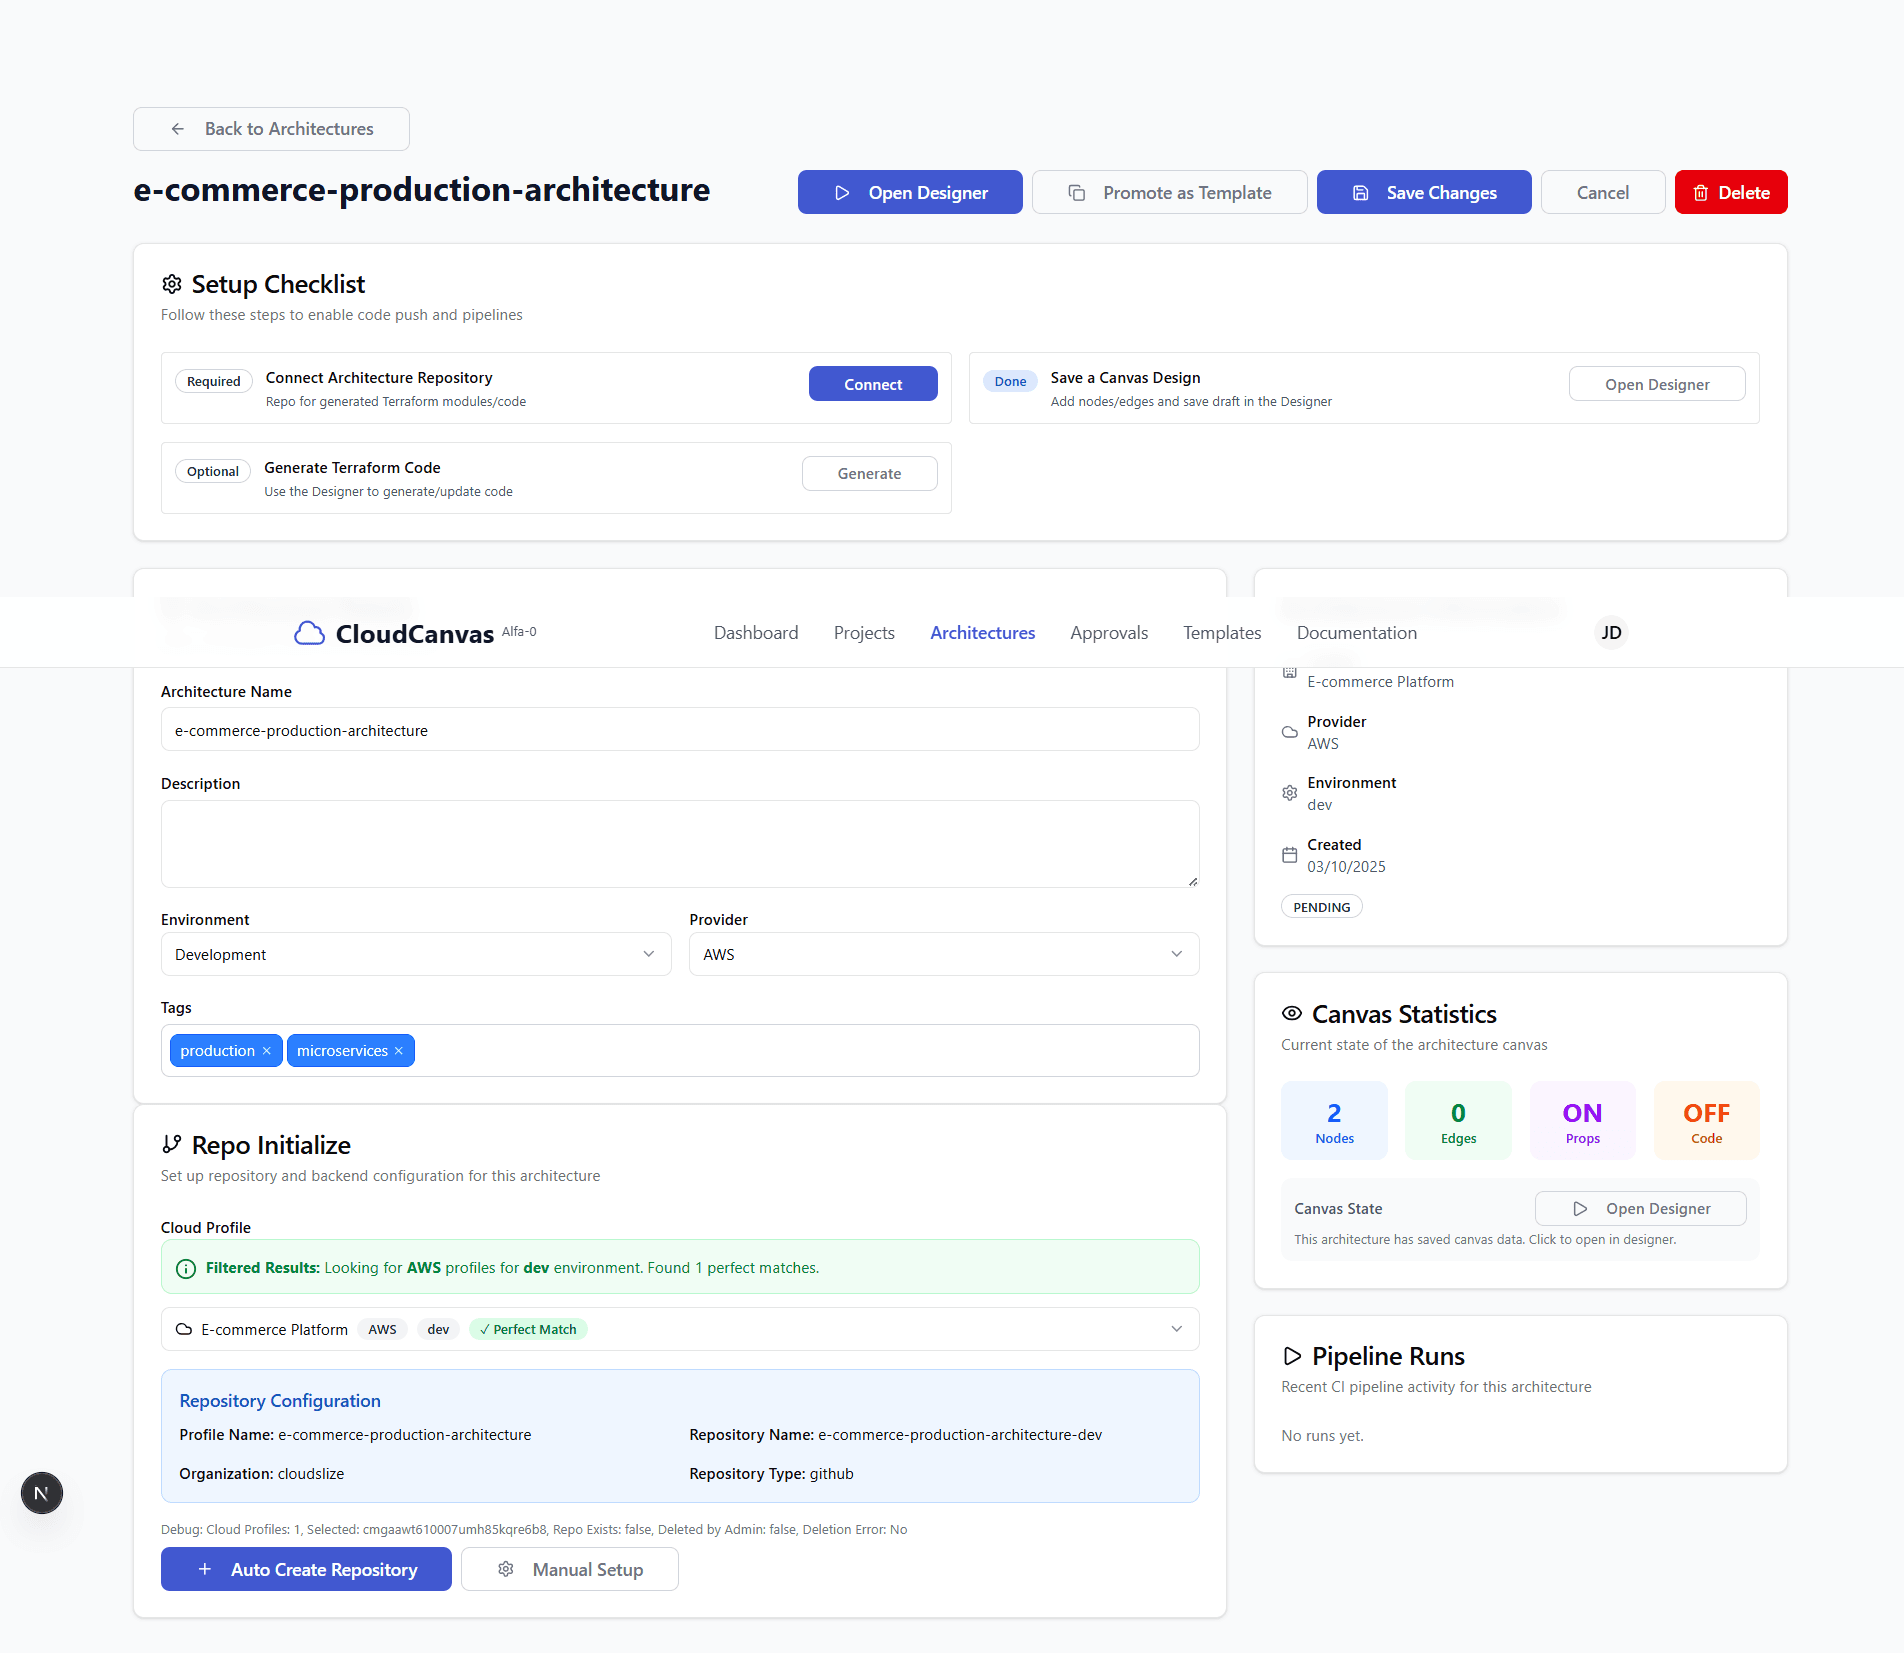
Repository setup interface with cloud profile selection and auto-create options
Create Cloud Profile
If you need to create a new cloud profile, fill out the cloud provider profile form with your credentials:
- Profile Name: Enter a descriptive name for your cloud profile
- Cloud Provider: Select your cloud provider (AWS, Azure, GCP)
- Credentials: Provide your cloud provider access credentials
- Region: Specify your preferred deployment region
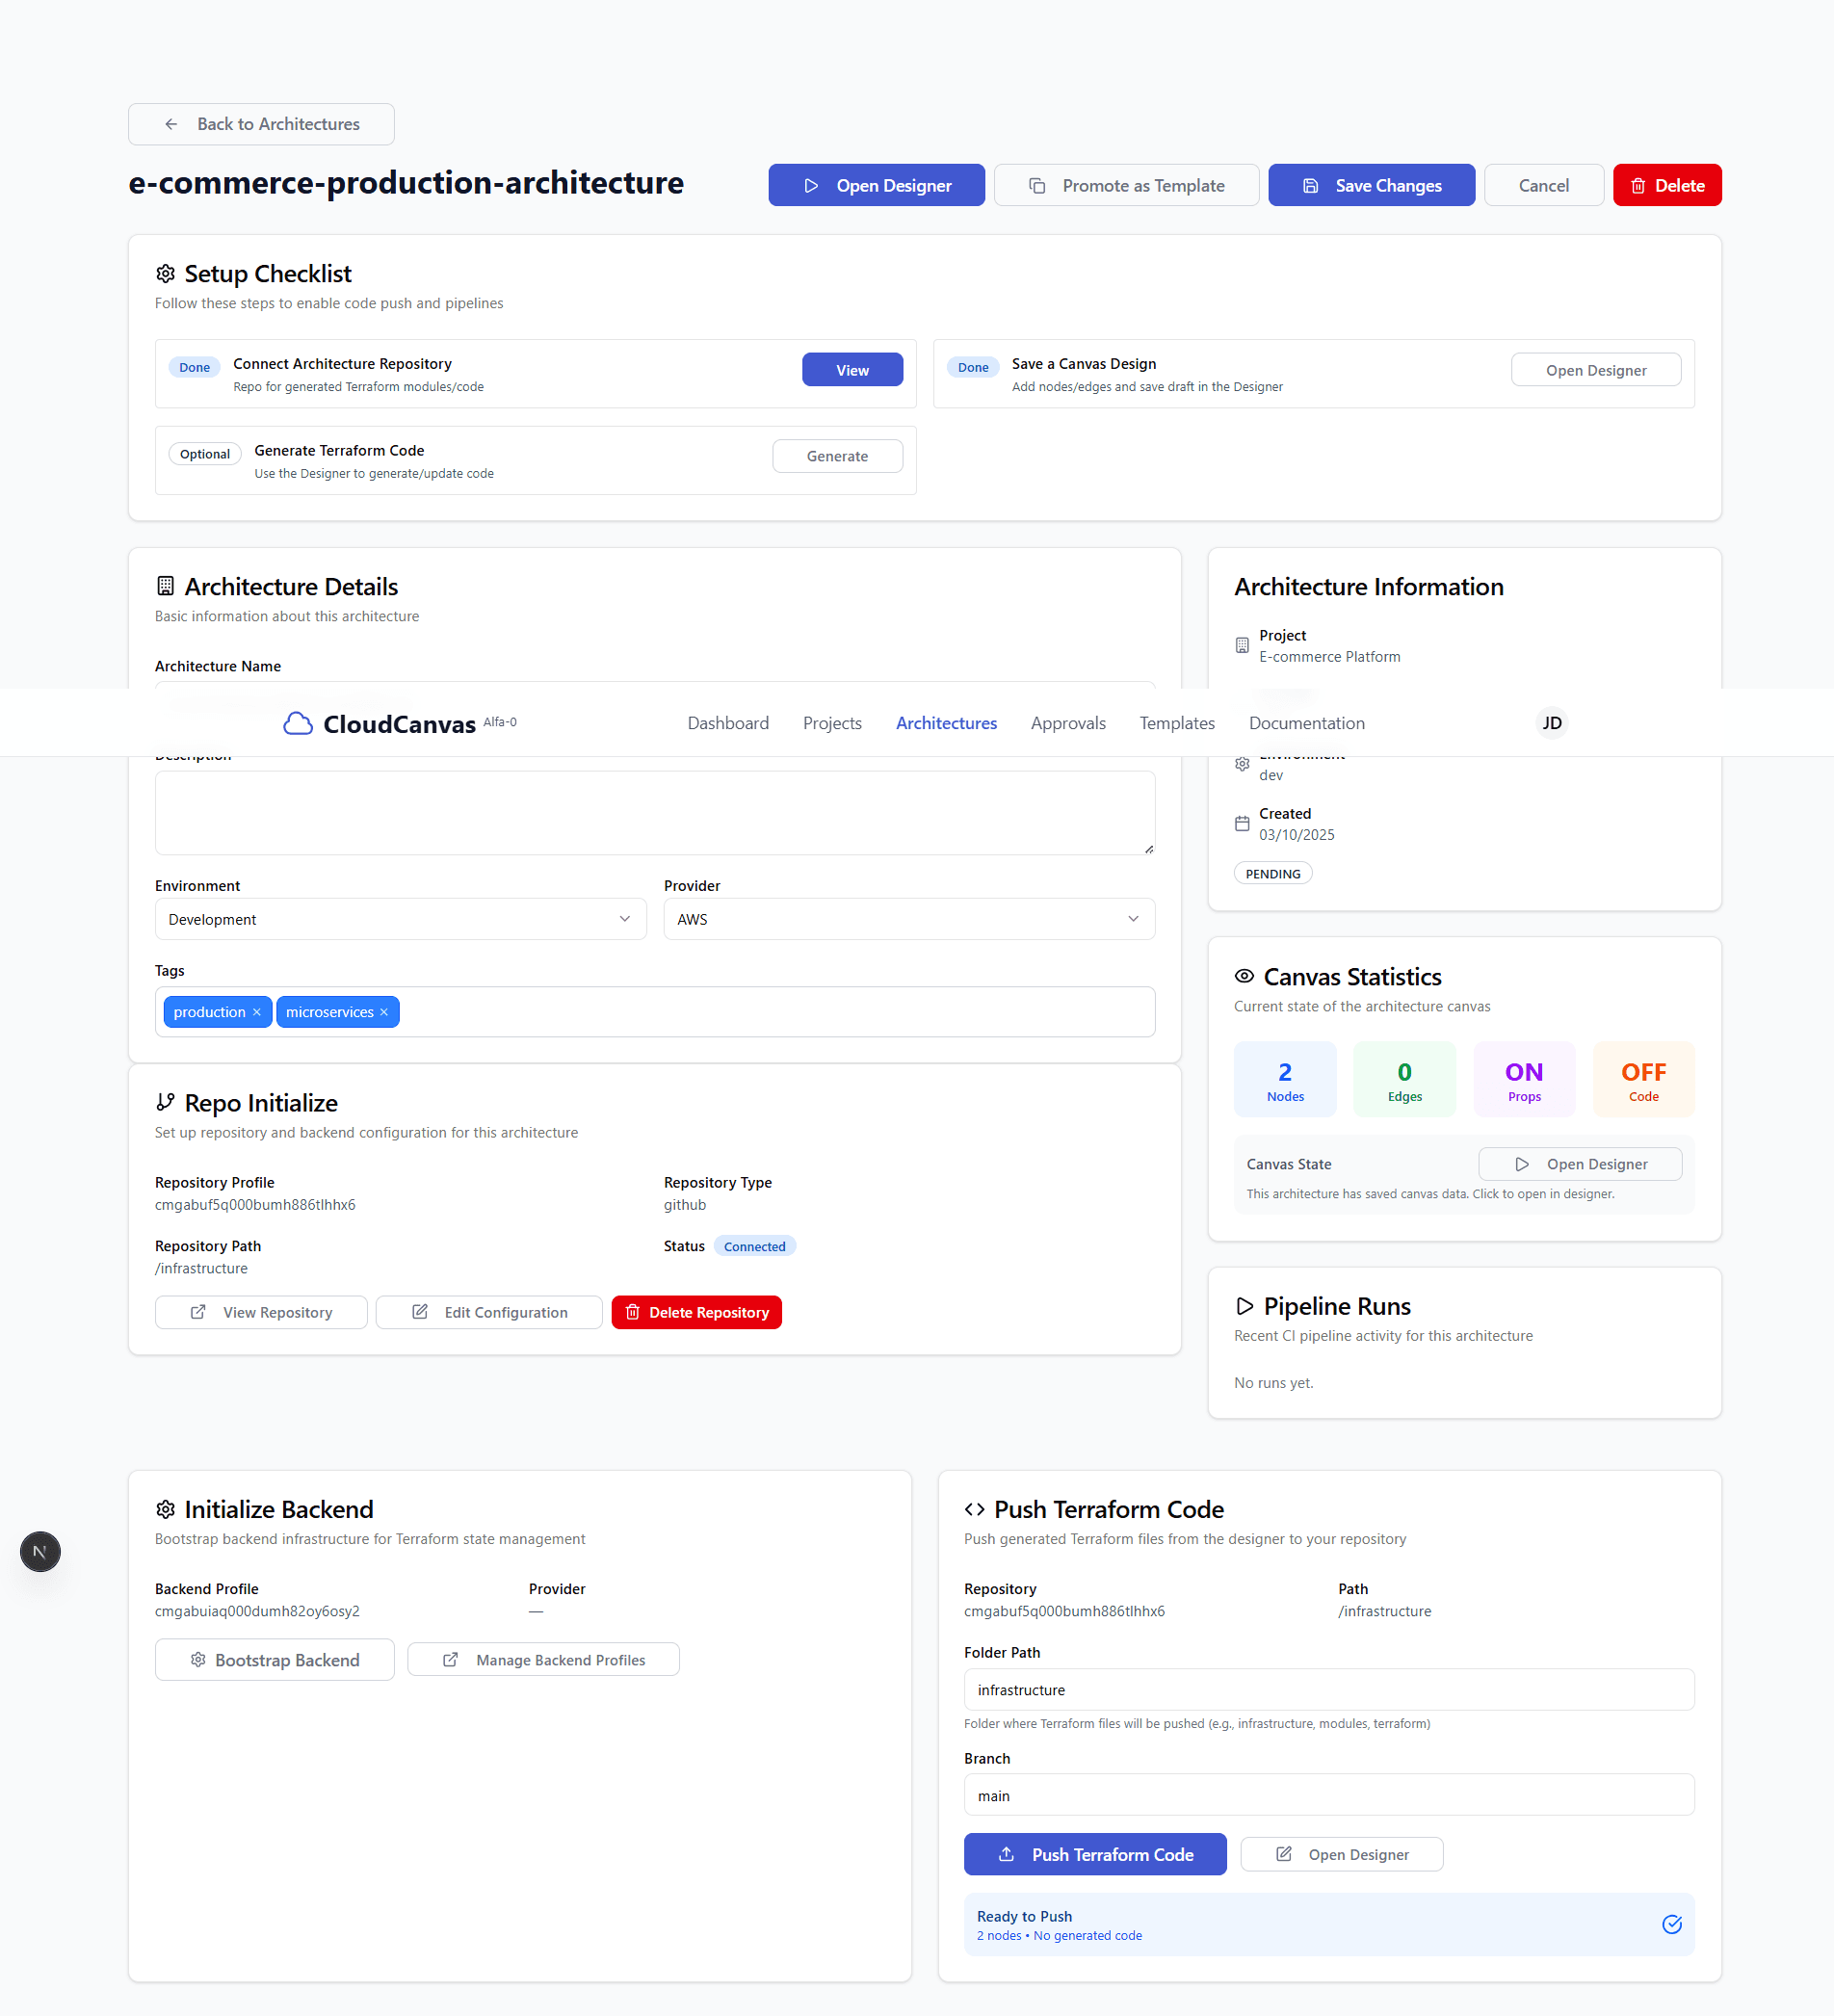
Repository successfully created with backend initialization and terraform push options
Select Cloud Profile
Choose your cloud profile from the dropdown menu. If you have multiple profiles, select the one you want to use for this architecture deployment.
💡 Tip: Make sure your selected cloud profile has the necessary permissions for repository creation and deployment.
Auto Create Repository
Click "Auto Create Repository" to automatically set up the repository integration. This process will:
- Create a new GitHub repository for your architecture
- Set up CI/CD pipelines with your cloud provider
- Configure automated deployment workflows
- Wait for the repository creation to complete (page will refresh automatically)
💡 Tip: The auto-create feature will set up a complete CI/CD pipeline with your cloud provider, including automated deployments, monitoring, and rollback capabilities.
View Repository
After the repository is created successfully, click "View Repository" to open the GitHub repository in a new tab. This will show you the generated repository structure and files.
The repository will contain the necessary files for your cloud architecture deployment, including Terraform configurations and CI/CD pipeline files.
Repository Integration Features
Automated Deployment
Automatic deployment of your Terraform code to your cloud provider when changes are pushed.
CI/CD Pipeline
Complete continuous integration and deployment pipeline with testing and validation.
Version Control
Git-based version control for your infrastructure code with branching and merging support.
Monitoring Integration
Built-in monitoring and alerting for your deployed infrastructure components.
Cloud Profile Management
Supported Cloud Providers
Amazon Web Services
AWS credentials and region configuration
Microsoft Azure
Azure subscription and resource group setup
Google Cloud Platform
GCP project and service account configuration
Security Features
- • Encrypted credential storage
- • Role-based access control
- • Audit logging for all deployments
- • Secure credential rotation
🔧Troubleshooting
Repository creation fails?
Check that your cloud profile credentials are valid and have the necessary permissions for repository creation.
Deployment pipeline not working?
Verify that your cloud provider credentials have the required IAM permissions for infrastructure deployment.
Need to update cloud profile?
You can edit your cloud profiles from the settings page to update credentials or configuration.
🚀 What's Next?
Your repository is now set up! You can start making changes to your architecture and they will be automatically deployed.